Installation
Step 1. Add Snippet Files
In your theme, open the Snippets folder, and add a new snippet named mw_PO_cart. Fill it in with the code from below and save.
{% case code %}
  {% when 'class' %}mw_cart_line
	{% when 'style' %}data-id="{{ mw_PO_cart.id }}" {% if mw_PO_cart.product.type == 'mw_product_option' or mw_PO_cart.properties._mw_is_variant %} style="display:none"{% endif %}
	{% when 'relation' %}
		<span data-mw-relation="{{ mw_PO_cart.properties._mw_option_relation }}"></span>
	{% when 'properties'%}
		{% assign propertySize = mw_PO_cart.properties | size %}
		{% if propertySize > 0 and mw_PO_cart.product.type != 'mw_product_option' %}
    		{% for p in mw_PO_cart.properties %}
        		{% unless p.last == blank %}
        			<br>
        			{% if p.first contains '_mw_option_relation' %}{% continue %}{% endif; %}
        			{% if p.first contains '_replaced_image' %}{% continue %}{% endif; %}
                    {% comment %} add BOLD properties {% endcomment %}
                    {% if p.first contains '_builder_id' %}{% continue %}{% endif; %}
                    {% if p.first contains '_master_builder' %}{% continue %}{% endif; %}
        			<span class="option-cart-title">{{ p.first }}:</span>
					{% if p.last contains '/uploads/' %}
                		<a class="lightbox" href="{{ p.last }}">{{ p.last | split: '/' | last }}</a>
        			{% else %}
            			<span class="option-cart-title-content">{% for prop in p.last %}{{ prop }}{% if forloop.last == false %}, {% endif %}{% endfor %}</span>
        			{% endif %}
        		{% endunless %}
    		{% endfor %}
        	<br>
        	<a href="javascript:void(0)" class="edit-options" data-item-id="{{ mw_PO_cart.id }}" data-line-id="{{ forloop.index }}"><small>Edit Options</small></a>
		{% endif %}

	{% when 'price' %}
		{% assign productPrice = 0 %}
	    {% for nextItem in cart.items %}
		    {% if mw_PO_cart.properties._mw_option_relation %}
      		    {% if mw_PO_cart.properties._mw_option_relation == nextItem.properties._mw_option_relation %}
        		    {% assign productPrice = 1 | times: nextItem.price | plus: productPrice %}
      		    {% endif %}
		    {% else %}
			    {% assign productPrice = mw_PO_cart.price %}
		    {% endif %}
        {% endfor %}
	    {{ productPrice | money }}
	{% when 'line_price'%}
		{% assign productLinePrice = productPrice | times: mw_PO_cart.quantity %}
	    {{ productLinePrice | money }}
{% endcase %}
When done, click Save.
Add another snippet named mw_PO_order. Fill it in with the code from below and save.
{% for p in mw_PO_order.properties %}
    {% unless p.last == blank %}
         <br>
         {% if p.first contains '_mw_option_relation' %}{% continue %}{% endif; %}
         {% if p.first contains '_replaced_image' %}{% continue %}{% endif; %}
         {% comment %} add BOLD properties {% endcomment %}
         {% if p.first contains '_builder_id' %}{% continue %}{% endif; %}
         {% if p.first contains '_master_builder' %}{% continue %}{% endif; %}
         <span class="option-cart-title">{{ p.first }}:</span>
		 {% if p.last contains '/uploads/' %}
              <a class="lightbox" href="{{ p.last }}">{{ p.last | split: '/' | last }}</a>
         {% else %}
              <span class="option-cart-title-content">{% for prop in p.last %}{{ prop }}{% if forloop.last == false %}, {% endif %}{% endfor %}</span>
         {% endif %}
    {% endunless %}
{% endfor %}
When done, click Save.
Add another snippet named mw_PO_objects. Fill it in with the code from below and save.
<style>.mw-product-options .mw-init-spinner{width:100%;text-align:center}.mw-product-options .mw-init-spinner>div{width:18px;height:18px;background-color:#999;border-radius:100%;display:inline-block;-webkit-animation:sk-bouncedelay 1.4s infinite ease-in-out both;animation:sk-bouncedelay 1.4s infinite ease-in-out both}.mw-product-options .mw-init-spinner .bounce1{-webkit-animation-delay:-.32s;animation-delay:-.32s}.mw-product-options .mw-init-spinner .bounce2{-webkit-animation-delay:-.16s;animation-delay:-.16s}@-webkit-keyframes sk-bouncedelay{0%,100%,80%{-webkit-transform:scale(0)}40%{-webkit-transform:scale(1)}}@keyframes sk-bouncedelay{0%,100%,80%{-webkit-transform:scale(0);transform:scale(0)}40%{-webkit-transform:scale(1);transform:scale(1)}}</style>
<script type="text/javascript">
  window.mwProductOptionsObjects = {
  product: {{ product | json }},
  cart: {{ cart | json }},
  template_name: {{ template.name | json }},
  shop: {
    domain: {{ shop.permanent_domain | json }},
    money_format : {{ shop.money_format  | json }},
    money_with_currency_format : {{ shop.money_with_currency_format  | json }}
  }
};
function mwShowInitSpinner() {
  var opt = document.getElementsByClassName('mw-product-options');
  if (opt.length > 0) {
    var timeSpinner = 6000;
    opt[0].innerHTML = '<div id="mw-apo-init-spinner" class="mw-init-spinner"><div class="bounce1"></div><div class="bounce2"></div><div class="bounce3"></div></div>';
    setTimeout(function(){ document.getElementById('mw-apo-init-spinner') && document.getElementById('mw-apo-init-spinner').remove(); }, timeSpinner);
  }
}
mwShowInitSpinner();
</script>
When done, click Save.
Step 2. Edit Layout/theme.liquid
At the next step, jump to Layout/theme.liquid and search the code. Before the line:
</body>enter:
{% include 'mw_PO_objects' %}Step 3. Edit Sections/product-template.liquid
At the next step, jump to Sections/product-template.liquid and search the code for form. After the line:
<form action="/cart/add" method="post" enctype="multipart/form-data" id="AddToCartForm">
enter:
<span class="mw-product-options"></span>
If you find something like:
{% include 'product-form' %}
You should go to Snippets/product-form.liquid and find the line that starts with:
<form action="/cart/add">
After this line, enter:
<span class="mw-product-options"></span>
Step 4. Edit Sections/cart-template.liquid
Find the line:
{% for item in cart.items %}
It should be followed by the cart_item opening tag. This is how the tag looks in the default Shopify theme.
<div class="cart__row">
But note that sometimes it may look like this:
<li class="...">
or this:
<tr class="...">
These are 3 possible variants you can edit cart-template.liquid:
1.
<div class="cart__row">
should be replaced with:
<div class="cart__row {% include 'mw_PO_cart', code: 'class' %}" {% include 'mw_PO_cart' with item, code: 'style' %}>
{% include 'mw_PO_cart' with item, code: 'relation' %}
2.
<li class="...">
should be replaced with:
<li class="... cart__row {% include 'mw_PO_cart', code: 'class' %}" {% include 'mw_PO_cart' with item, code: 'style' %}>
{% include 'mw_PO_cart' with item, code: 'relation' %}
... — these are the words that were in the code before the changes were made.
3.
<tr class="...">
should be replaced with:
<tr class="... cart__row {% include 'mw_PO_cart', code: 'class' %}" {% include 'mw_PO_cart' with item, code: 'style' %}>
Note: {% include 'mw_PO_cart' with item, code: 'relation' %} should be placed inside of <td> that goes after the <tr> tag.
Next, we should find a piece of code that is responsible for building properties.
Search cart-template.liquid for property or properties to find the block that builds properties in a cart. This is how this block looks like in the default theme:
{% assign property_size = item.properties | size %}
  {% if property_size > 0 %}
    {% for p in item.properties %}
        {% if forloop.first %}<br>{% endif %}
        {% assign first_character_in_key = p.first | truncate: 1, '' %}
        {% unless p.last == blank or first_character_in_key == '_' %}
          {{ p.first }}:

          {% if p.last contains '/uploads/' %}
            <a href="{{ p.last }}">{{ p.last | split: '/' | last }}</a>
          {% else %}
            {{ p.last }}
          {% endif %}

          <br>
        {% endunless %}
    {% endfor %}
  {% endif %}
Comment this block with {% comment %}{% endcomment %}. Put {% comment %} before the block, and {% endcomment %} after it.
After {% endcomment %} add:
{% include 'mw_PO_cart' with item, code: 'properties' %}
Find this line:
{{ item.price | money }}
and replace it with:
{% include 'mw_PO_cart' with item, code: 'price' %}
Find this line:
{{ item.line_price | money }}
and replace it with:
{% include 'mw_PO_cart' with item, code: 'line_price' %}
Should any questions arise during the installation process, please contact our support team for help.
Step 5. Edit Templates/customers/order.liquid
Find the line:
{{ line_item.title | link_to: line_item.product.url }}
After it add:
{% include 'mw_PO_order' with line_item %}
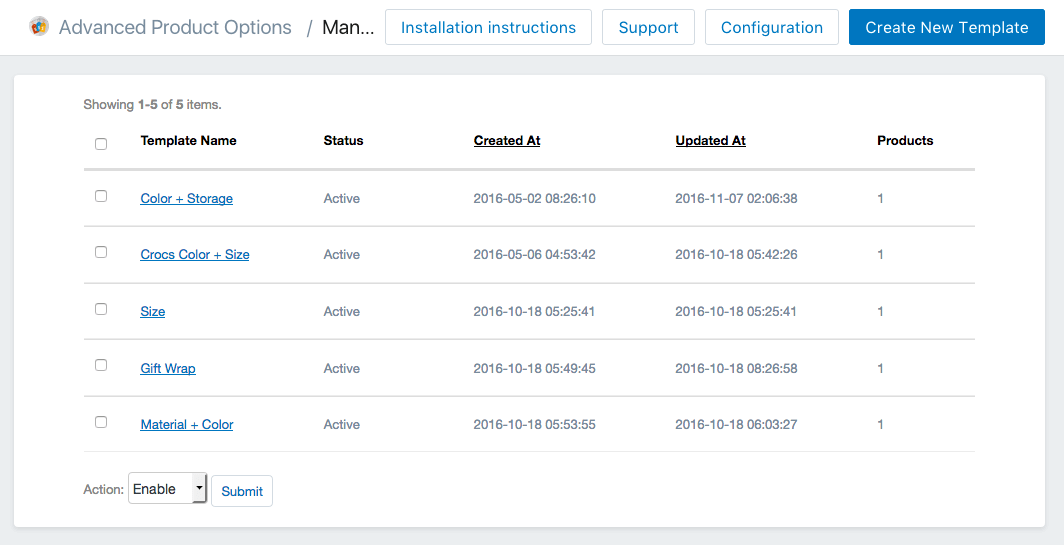
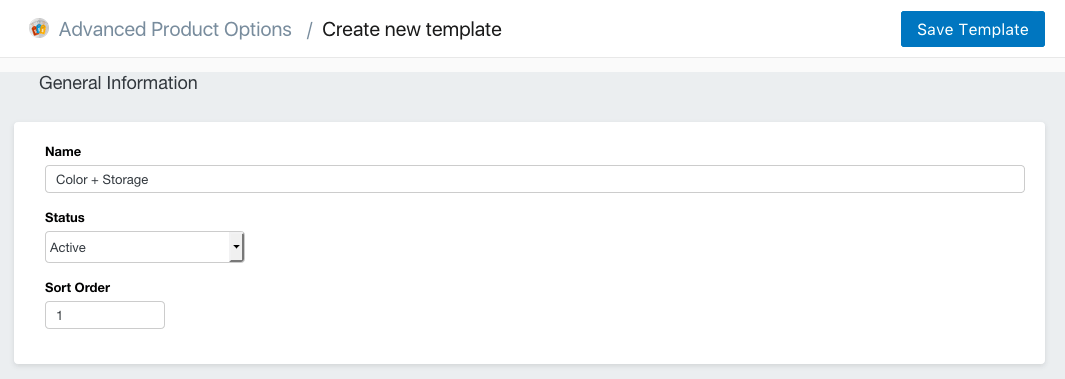
Creating a New Custom Options Template
To create a new Product Custom Options template, follow the steps below:
Next, add product custom options. That can be variants for color, dimensions, memory storage, etc.
To add a new product custom options:
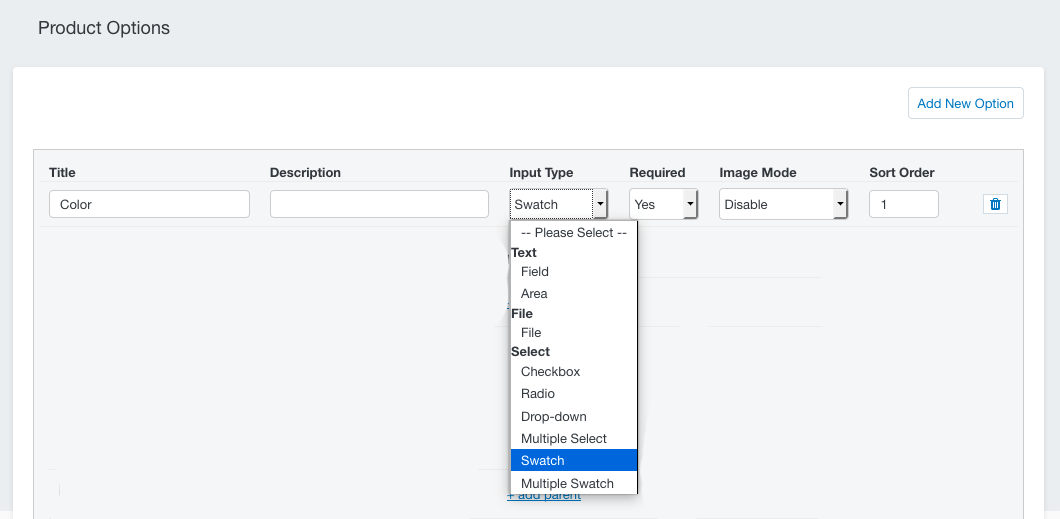
Also, from here you can set this option as required or non-required.
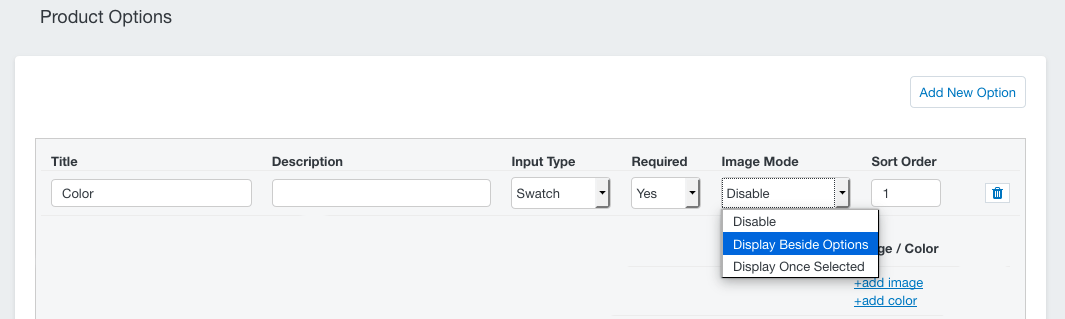
Under the Image Mode drop-down menu, you can:
Additionally, you can opt to ignore the first product custom image (the image can be the same as the main one).
Now, let’s set custom option’s values.
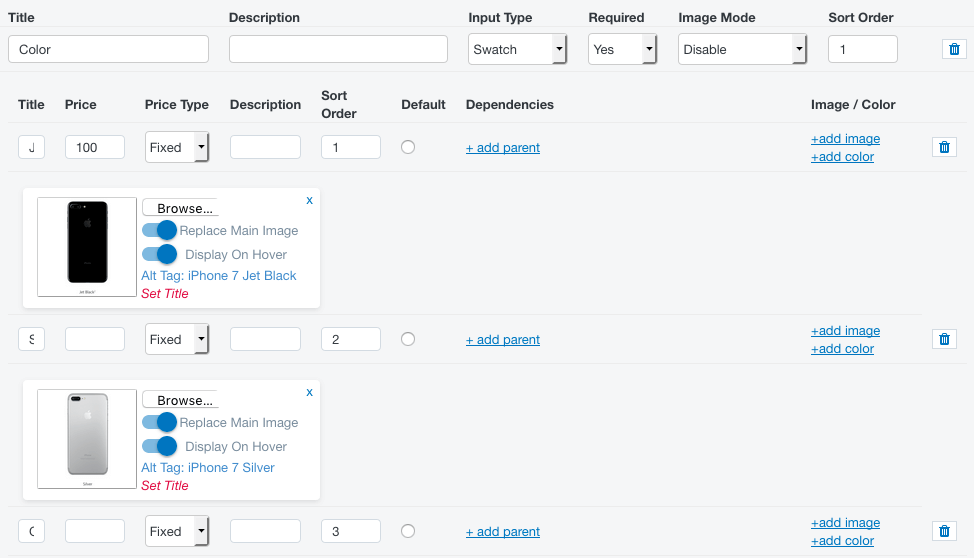
In these fields, you can define a price of any option’s value, add its title, description and specify a sorting order.
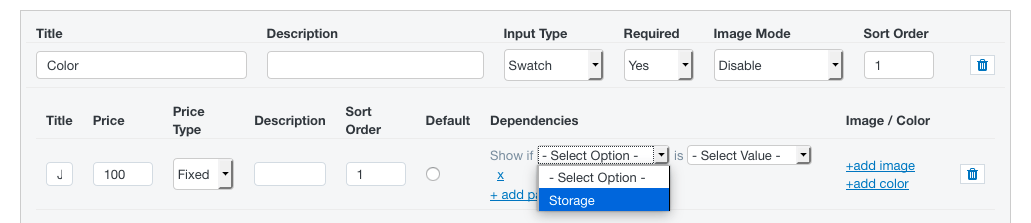
Moreover, you can set various dependencies based on the product’s options and values. To do that, click on the Add Parent link and specify dependency conditions.
Next, let’s set a custom option’s Color/Image Swatch.
Click either on the Add Image or Add Color link, and add custom option images or colors.
Also, to make your product option images SEO-friendly, specify their alt-tags and titles.
Choosing Products to Assign a Template to
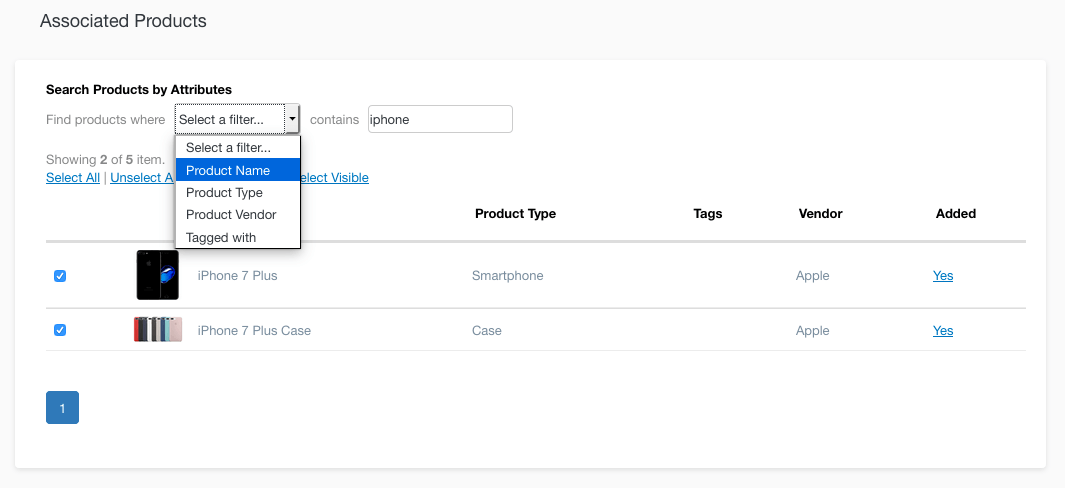
At the very bottom of any Product Options Template settings, you can select products to apply that template to.
With advanced search filters, so you could quickly find the needed products and add them to the template.
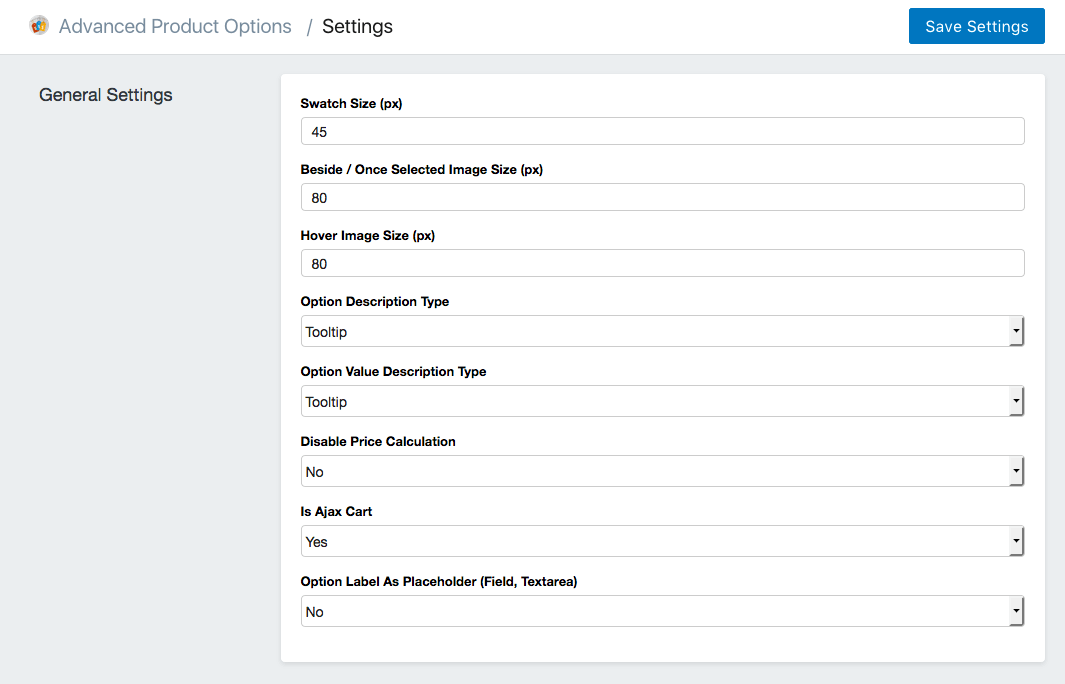
General App Settings
You can manage all your templates under the app’s general settings. From here, it’s possible to:

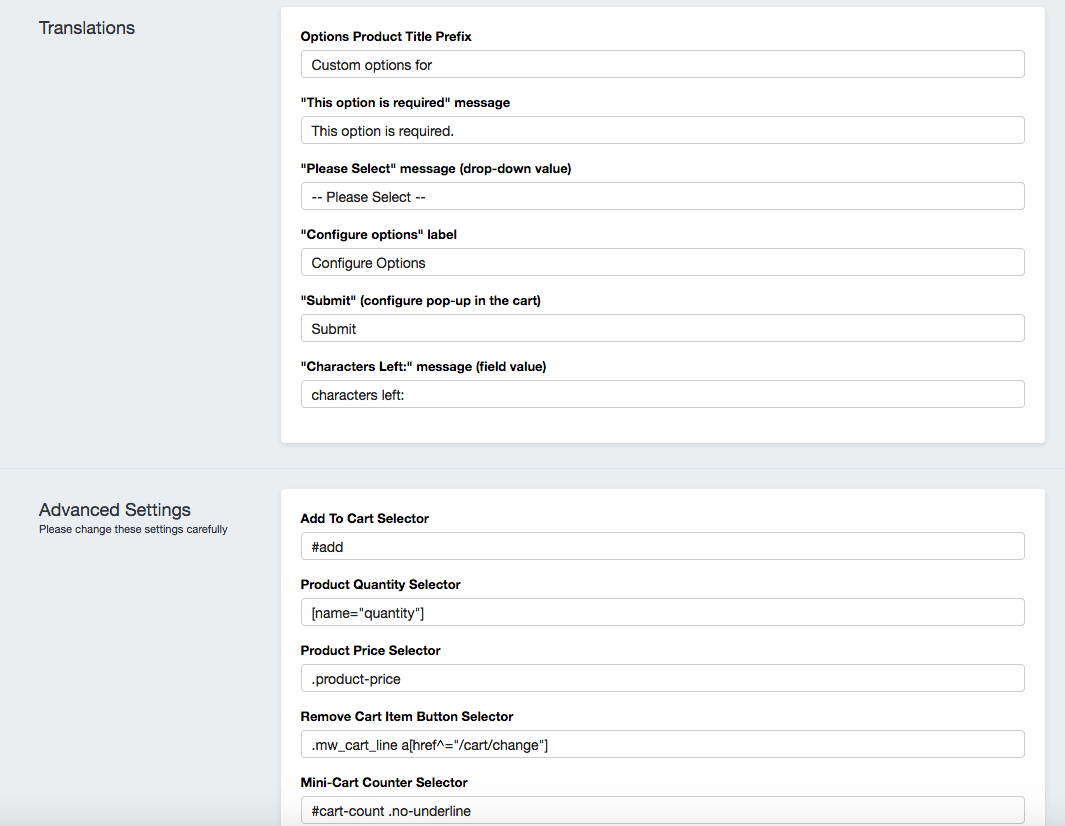
Advanced Settings
In the app’s general setting feed, click the Configuration button.
It will open the page, where you’ll be able to:
Like the App?
Please let us know what you think of our software in the Users’ Reviews section in the App Store. Your opinion is truly important to us!